

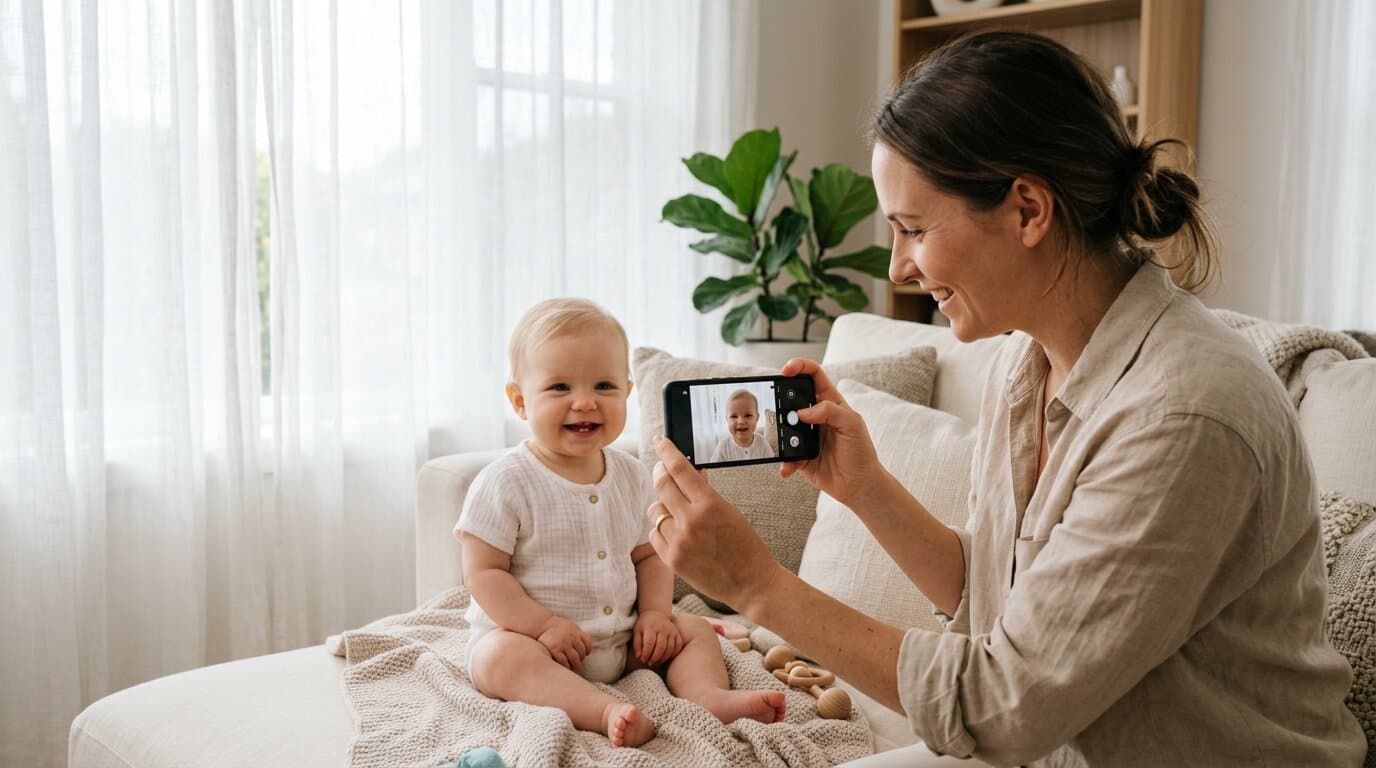
For studio-quality baby photos on your phone, position your baby at a 45-degree angle to a large natural window with sheer white curtains to diffuse sunlight. Turn off all yellow overhead ceiling bulbs. In your camera app, turn on Portrait Mode (ƒ/2.8 – ƒ/3.5), lift exposure compensation to +0.3 to +0.7 EV, and use Burst Mode (10 fps) to freeze motion.
Taking crisp, studio-grade photos of babies on a smartphone is notoriously tricky. Babies move constantly, their skin tones easily get washed out or tinted yellow by indoor ceiling fixtures, and mobile camera sensors struggle in dimly lit rooms.
Fortunately, by making a few crucial adjustments to your phone's lighting and camera settings, you can immediately elevate your snapshots from grainy home photos to beautiful portraiture.
Here is the definitive guide to lighting angles, camera settings, and composition for baby photos at home.
1. The 3 Rules of Natural Lighting for Baby Photography
Professional photographers often spend thousands of dollars on strobe softboxes just to recreate the look of a large north-facing window. You can get that same soft lighting for free right in your home.
Rule 1: The 45-Degree Window Angle
Position your baby so the window is at a 45-degree angle relative to where you are standing with your camera.
- This creates gentle, soft shadows across their cheeks that give dimensionality and depth to their tiny features.
- Avoid placing the baby directly facing the window (which looks flat) or with their back to the window (which causes silhouetting).
Rule 2: Soften Harsh Sun With a Sheer Curtain
If direct sunlight is beaming through the glass, it will create squinting and harsh, unflattering contrast lines. Pull a translucent white sheer curtain over the window. This acts as a giant 6-foot diffuser, creating butter-soft glow across baby's skin.
Rule 3: The DIY Foam Board Reflector
Place a $3 white foam poster board on the floor opposite the window. It bounces natural daylight back into the shadow side of baby's face, eliminating dark eye circles.
2. Recommended Phone Camera Settings (iOS & Android)
| Setting | Recommended Value | Why It Matters |
|---|---|---|
| Camera Mode | Portrait Mode | Creates natural creamy background separation (bokeh) |
| Aperture / Depth (ƒ) | ƒ/2.8 to ƒ/3.5 | Keeps whole face sharp while blurring clutter behind |
| Exposure Compensation | +0.3 to +0.7 EV | Brightens baby skin tones without blowing out highlights |
| Live Photo / Motion | ON | Lets you scrub frames to pick the exact millisecond of a smile |
| Grid Lines (3x3) | ON | Helps keep eye level on the upper rule-of-thirds line |
(For iPhone-specific native editing formulas, check our step-by-step iPhone baby photography guide).
3. How to Capture Fast-Moving Babies Without Blur
Babies don't pose on command. They kick, roll, swat at props, and crawl away.
- Use Burst Mode:
- On iPhone: Tap the shutter and slide it to the left.
- On Samsung / Google Pixel: Tap and drag down the shutter button.
- Take 20-30 rapid shots in 2 seconds while saying their favorite sound. Then pick the one where their eyes sparkle.
- Turn Off Macro Mode: Macro mode switches to the ultra-wide lens close up, causing distorted "bobblehead" proportions. Keep the 2x or 3x telephoto portrait lens active and step back 4-6 feet.
- Lock Auto-Focus & Exposure (AE/AF Lock): Tap and hold baby's face until you see the yellow box lock. This prevents your phone from constantly hunting for focus when baby fidgets.
4. Common Lighting Mistakes to Avoid
- ❌ Using the Camera Flash: Harsh, glaring, and irritates baby's sensitive eyes.
- ❌ Mixing Daylight with Yellow Lamps: When 5000K blue daylight mixes with 2700K orange ceiling bulbs, phone auto white-balance gets confused and skin turns patchy orange-green. Turn off all household lamps and rely strictly on daylight.
- ❌ Shooting from Adult Eye Level: Looking down at a baby on the rug creates a flat bird's-eye perspective. Lay flat on the floor so the camera lens is level with baby's chin.
Planning a birthday shoot? See our complete DIY 1st birthday photoshoot guide for props and schedule tips.
5. Don't Have Good Window Light in Your Home?
Achieving professional studio illumination at home requires sunny weather, big windows, and lots of patience while testing exposure values.
If your home has dim lighting or you don't want to spend your afternoon chasing light rays, you can turn any casual phone snapshot into a studio masterpiece in 2 minutes with AI.
With Baby AI Photoshoot, our neural rendering engine automatically constructs 3-point studio lighting, rim highlights, and soft catchlights in your baby's eyes — regardless of how dim your original photo was.
Explore our studio themes and templates and get started with our flexible studio plans starting from $14.90.